Oi folks, time for part one of this new devblog, covering asset extraction and conversion from the Arkham games using the UE Viewer and 3Ds Max.
Gildor’s UE Viewer/Umodel

1: Game Path Selection; 2: Asset Type Selection
This is an extremely handy tool when it comes to extracting assets from the Arkham games, which makes sense once you consider that this tool specialises on Asset Extraction from games using Unreal Engine. Once downloaded you will be greeted with a very pragmatic UI (see image on the right) that allows you to select the game path, the asset types you want to extract as well as optional overrides for the automatic engine detection. We dont need the latter as Umodel automatically detects the arkham games and their unreal engine versions.
I will use Batman: Arkham City as an example as it is a bit easier to navigate compared to the other titles. Most steps are analog to this in the other titles though.
Once you’ve entered the game path and pressed “Ok”, a new file-explorer esque window will open. You can then either manually go through the folders to find the packages you want to extract or, what i prefer to do as i know what to look for, you check the small box saying “Flat View” at the top left and then enter a relevant keyword. For player models this would be “Playable” or “Batman” in this case.
Once you have found the package you want to open you double click it and a new window will open, which allows you to preview visual assets contained in that package, you can either scrub through the assets and only extract specific ones with Ctrl+X or you go back to the file explorer window (can always be brought up again by pressing “O”) and select the package and press “Export” in the bottom right. This will extract all assets contained in this package and save them in a folder called “UmodelExport” next to the umodel executable. Models and animations are usually stored as psk(x) files and textures and tga files. The models can be imported into common ddc applications through plugins. Gildor provides import scripts for 3ds Max and Autodesk Maya but plugins for Blender exist as well. Personally I am using 3Ds Max as it’s free for students and also was the easiest to get the hang of for me, as someone who is very much used to the “microsoft way” of user interfaces.
File Structure Notes

Top Left: Flat View Checkbox and Search Field
In order to give you a slight head start I felt like it would be useful to provide some of the common file structure patterns, which make navigating through the game packages a bit easier once you know them.
- Player models can usually be found in packages that are named like this: Playable_<Character Name>_<Skin Name>_SF.upk
- For the default Batman Skin this would be: Playable_Batman_Std_SF.upk
- Player animations can be found in: Playable_<Character Name>_SF.upk
- For the Batman Player Animations this would be: Playable_Batman_SF.upk
- In Batman: Arkham Knight the player animations are instead stored in BmGame.upk. I recommend extracting the entire package once.
- Animations can only be previewed inside the UE Viewer if the package containing the models is loaded as well. Personally I think it’s easier to just export the whole package containing the animations once.
Converting Assets using 3Ds Max
I am only covering the process using 3Ds Max here as that is what I use and am knowledgable enough with for this. Please refer to guides and documentation of the respective plugins and editors when using something else.
Models
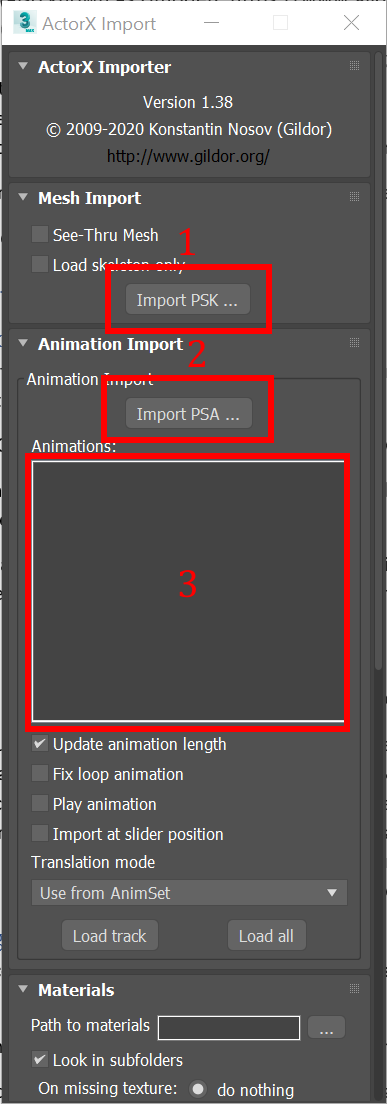
1: PSK Button for Models; 2: PSA Button for AnimSets; 3: Animation List Panel
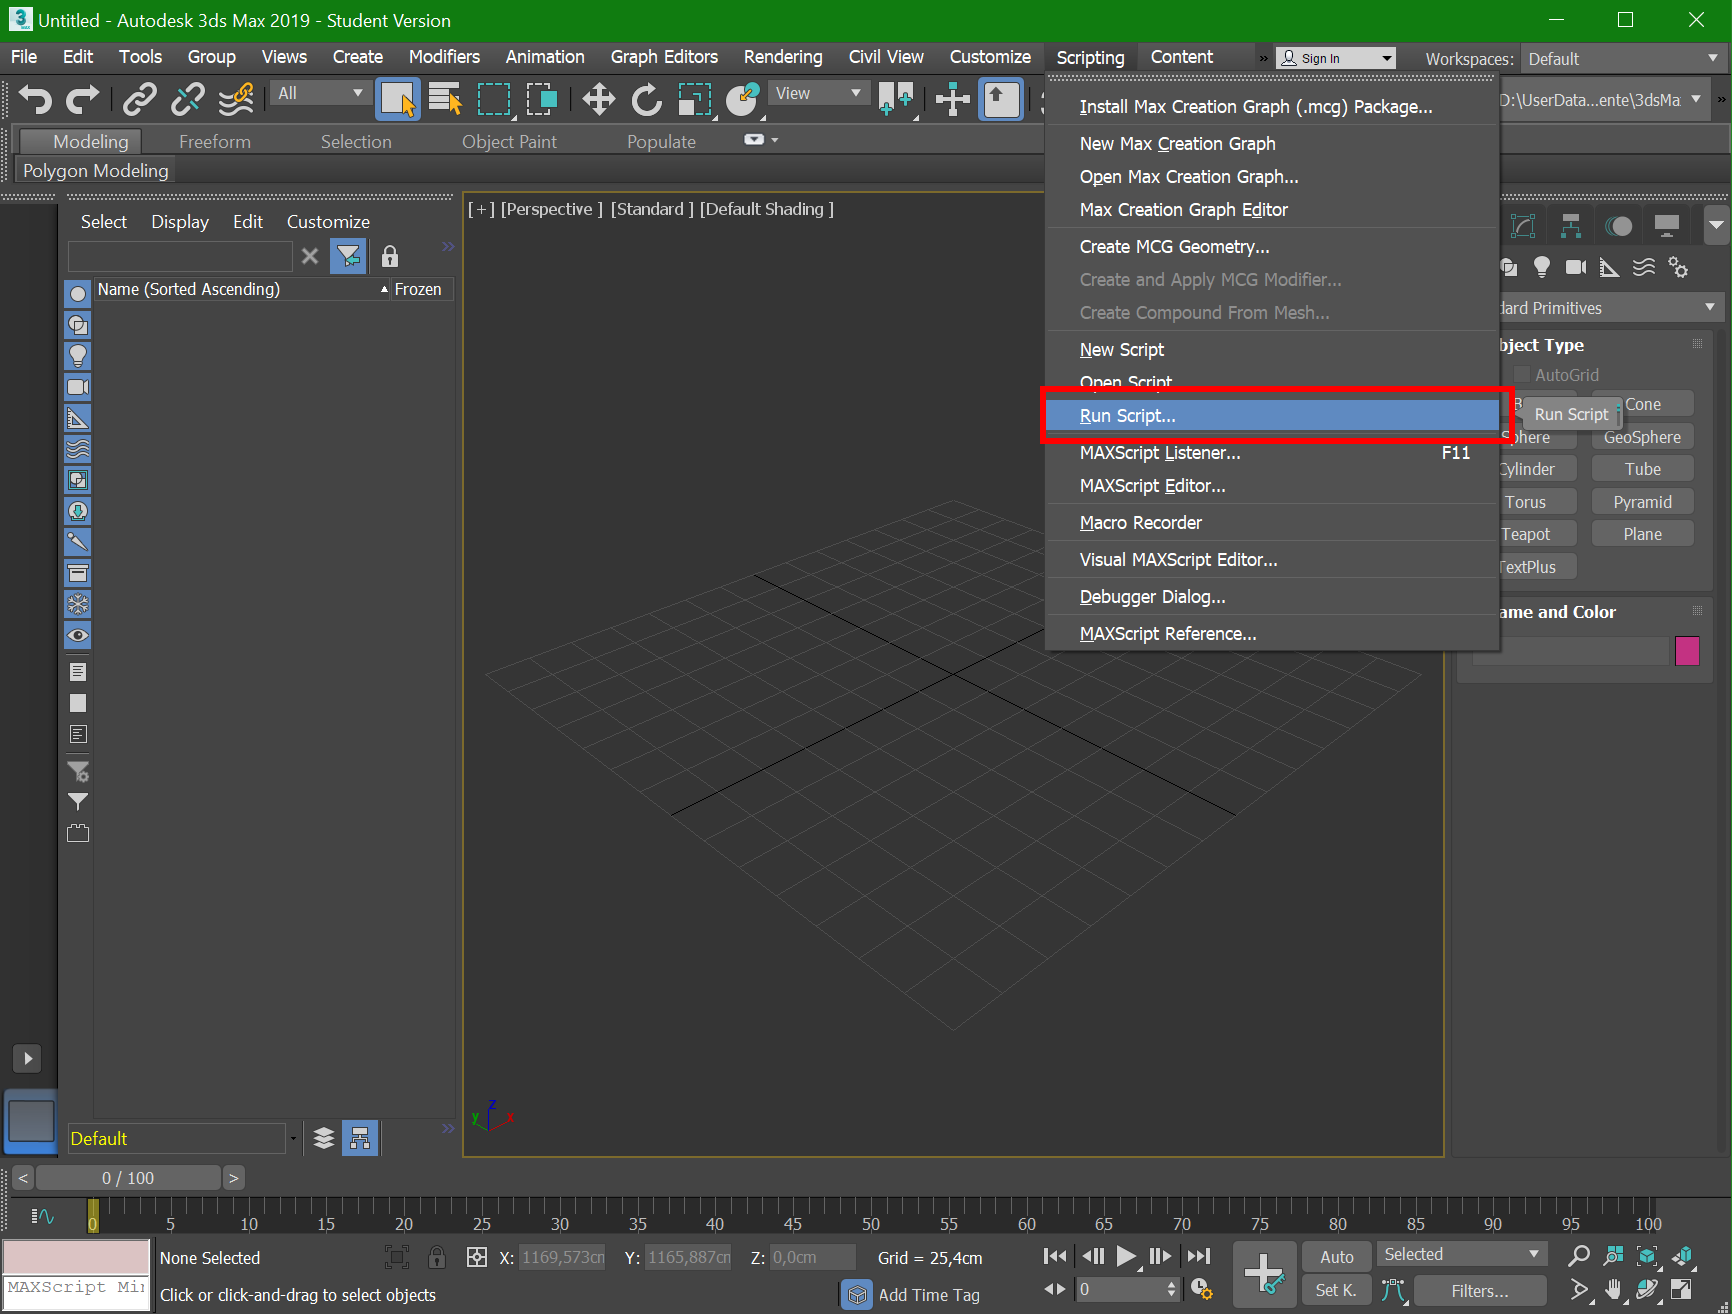
3Ds Max: Scripting Menu
PSK files are not very common these days and can’t be imported by Unreal Engine 4, so we need to convert them to something usable first, namely FBX.
In order to convert the models we first need the importer script for psk files, which is also made and provided by gildor. After you’ve downloaded it you can run it by opening the “Scripting” menu in Max, and then click on “Run Script” and navigate to the extracted zip folder of the download.
A small window with a bunch of options should now pop up, we only care about “Import PSK” for now. Once you’ve selected that, you have to navigate to the “SkeletalMesh3” folder of the package you unpacked in the last part and select the model you want to import. We will start with the Batman Body Mesh, so select “Batman_Body_Skin .psk”. Once you have imported it you will have both the model and the skeletal rig in the viewport. Naturally you’d also want the head and cape models to be present, so repeat the last step but with the cape and then the head model (in that order as the cape model might change the position of some bones and importing the head model on top reverts that change again). This can be done in the same scene as the body model since the rigs line up (although the cape rig is a bit more special to handle optimally later on). Once you have them imported you can then export them to fbx by clicking on “File”, “Export” and then selecting the topmost option in the export submenu. Save the file to whatever folder you want as long as you can find it later and press ok in the next dialogue as you don’t need to touch the export settings unless you know what you are doing.
After that save your 3Ds Max scene with the models, we will need it again later.
Animations
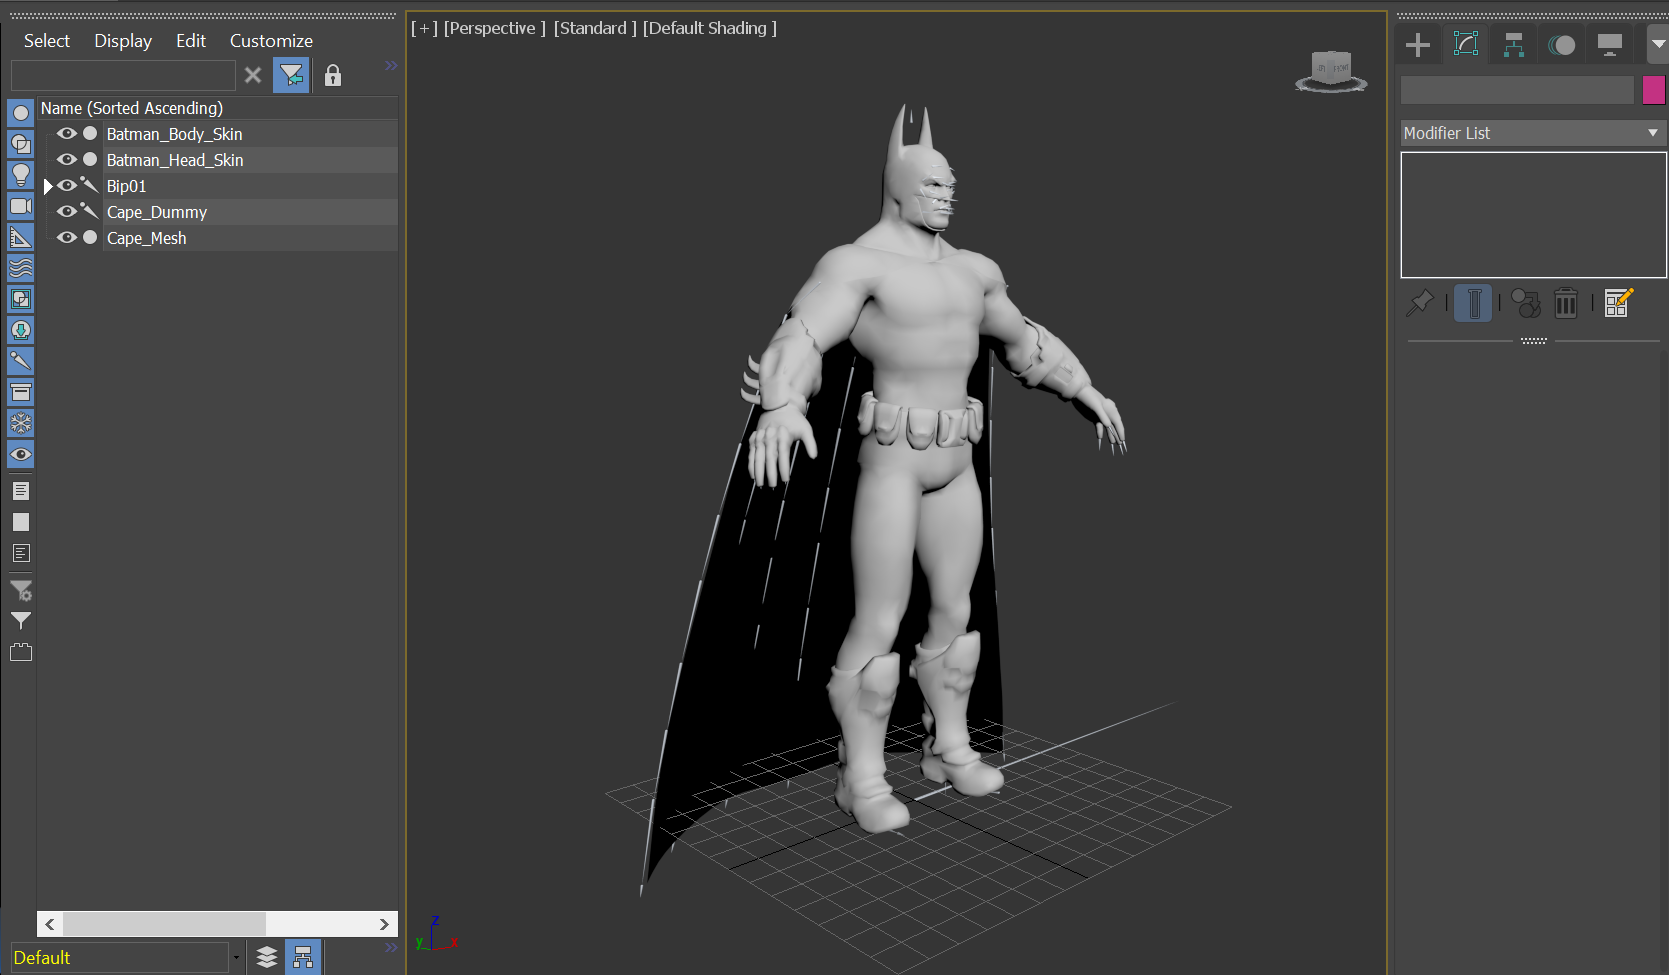
3Ds Max Scene with the models imported as described above
The player animations are stored separately from the player models in the arkham games. In the case of Arkham City they are stored in “Playable_Batman_SF.upk”. I would suggest you to just extract the whole package as it’s easier that way.
Once you have done that you will have an “AnimSet” folder in the extracted package folder. Open your 3Ds Max scene containing the models and run the ActorX importer script again, but this time select “Import PSA” as we now want to import animations.
Now you navigate to the folder containing the extracted anim sets and select the one you want to open. For the start we will use “BM_Movement.psa” as it contains the basic batman movement animations. The panel beneath the PSA import button will now have a list
with animations contained in that anim set, we will use “Stand_Idle”, “Walk_Forward” and “Run_Forward” as these allow us to create a very basic locomotion system.
Once you have imported the idle animation you can straight up export the scene to a new file(!) As we dont need to modify it.
The walking and running animations however use something called “root motion” which moves the base bone of the rig to the desired location of the movement. The rig structure of the arkham games is not compatible with the root motion system of Unreal Engine 4, so we will remove the root motion from it and use it as an inplace animation instead as this is much simpler than setting up a configuration that allows you to preserve the root motion. To do that you select the root bone (Bip01) after having imported the animation and then open 3Ds Max’ Keyframe editor (see images below). There you set the transformation key on the forward axis (easily distinguishable as its constantly increasing over time) to zero by selecting its keyframes and then setting their value to zero. This process can be done for all locomotion animations you want to use (e.g. for crouching as I am not separately covering that since it’s just the same steps).
After you have done that you can export the scene to a new file so you can import the animations later on.
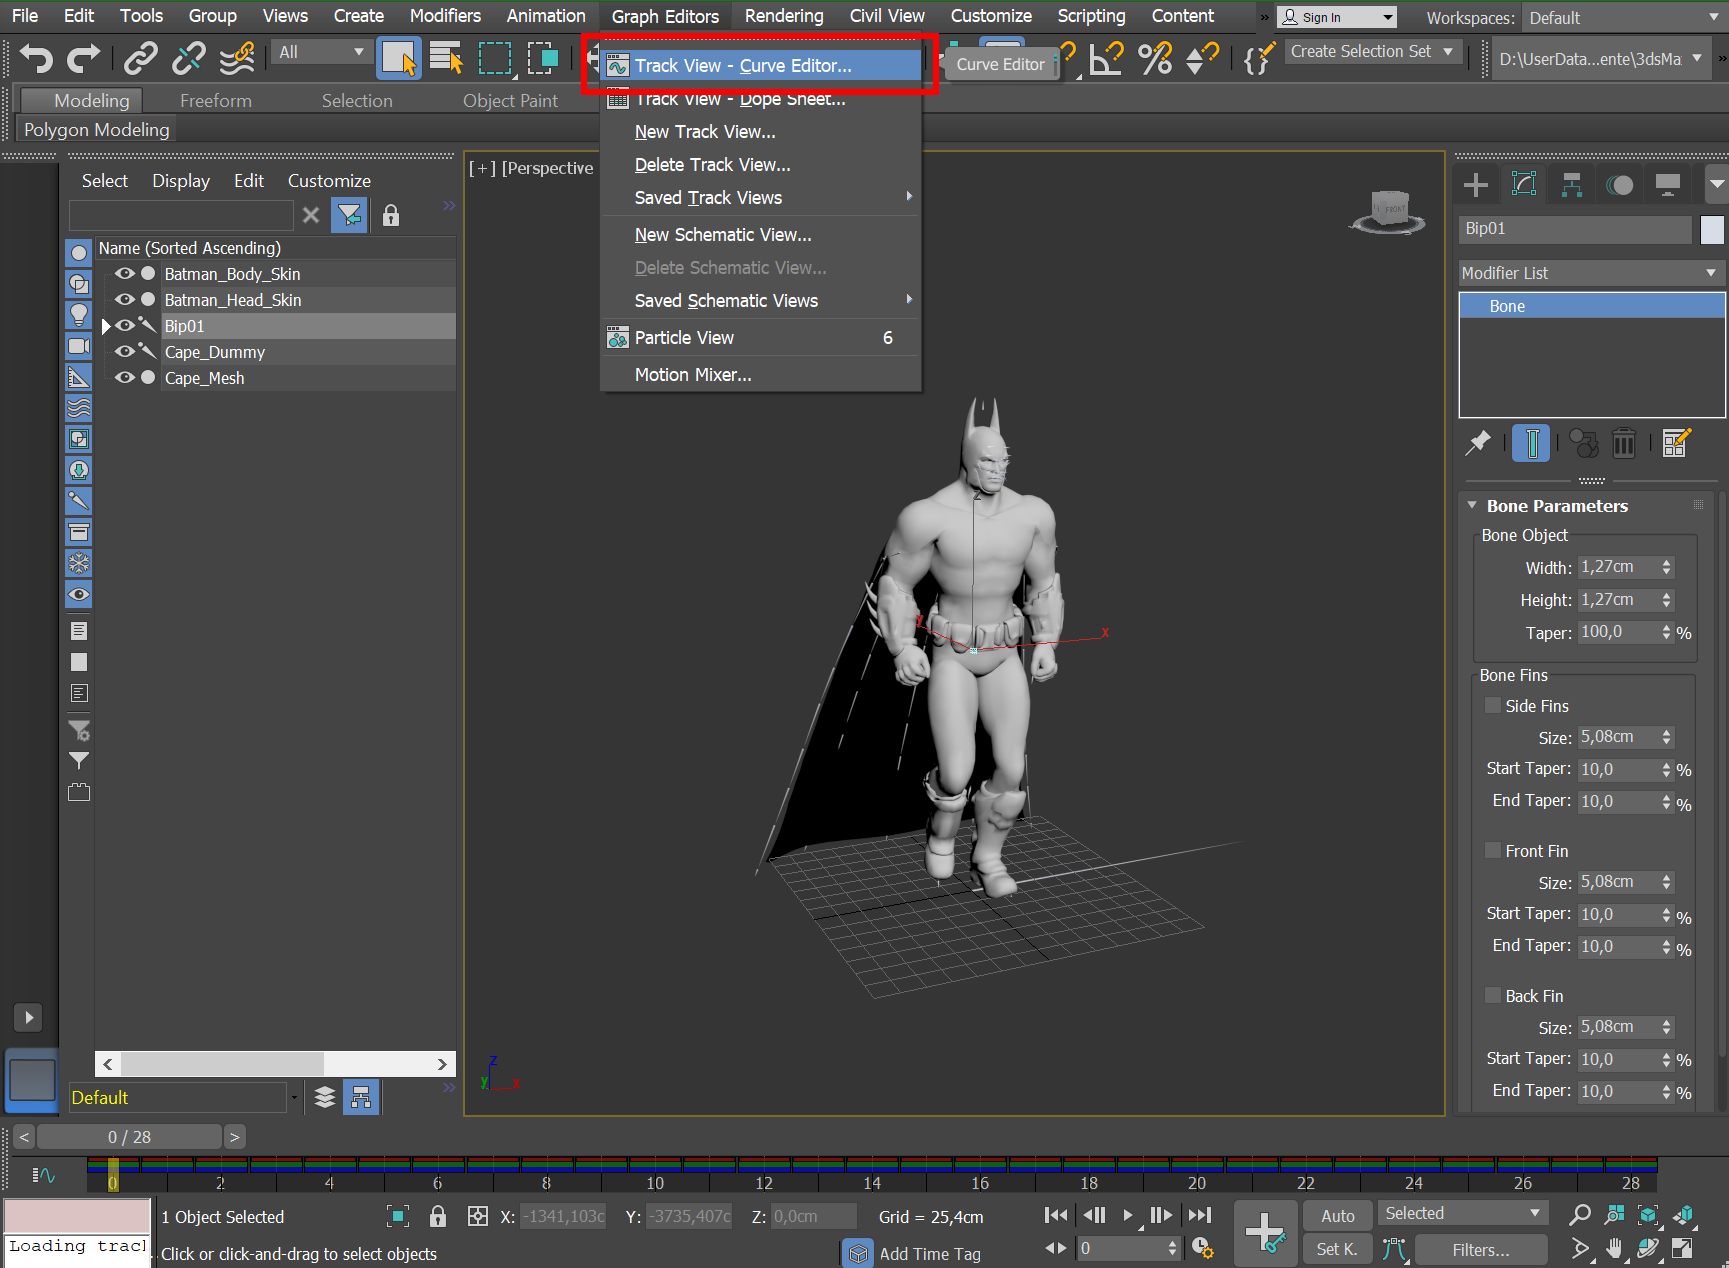 Curve Editor Access |
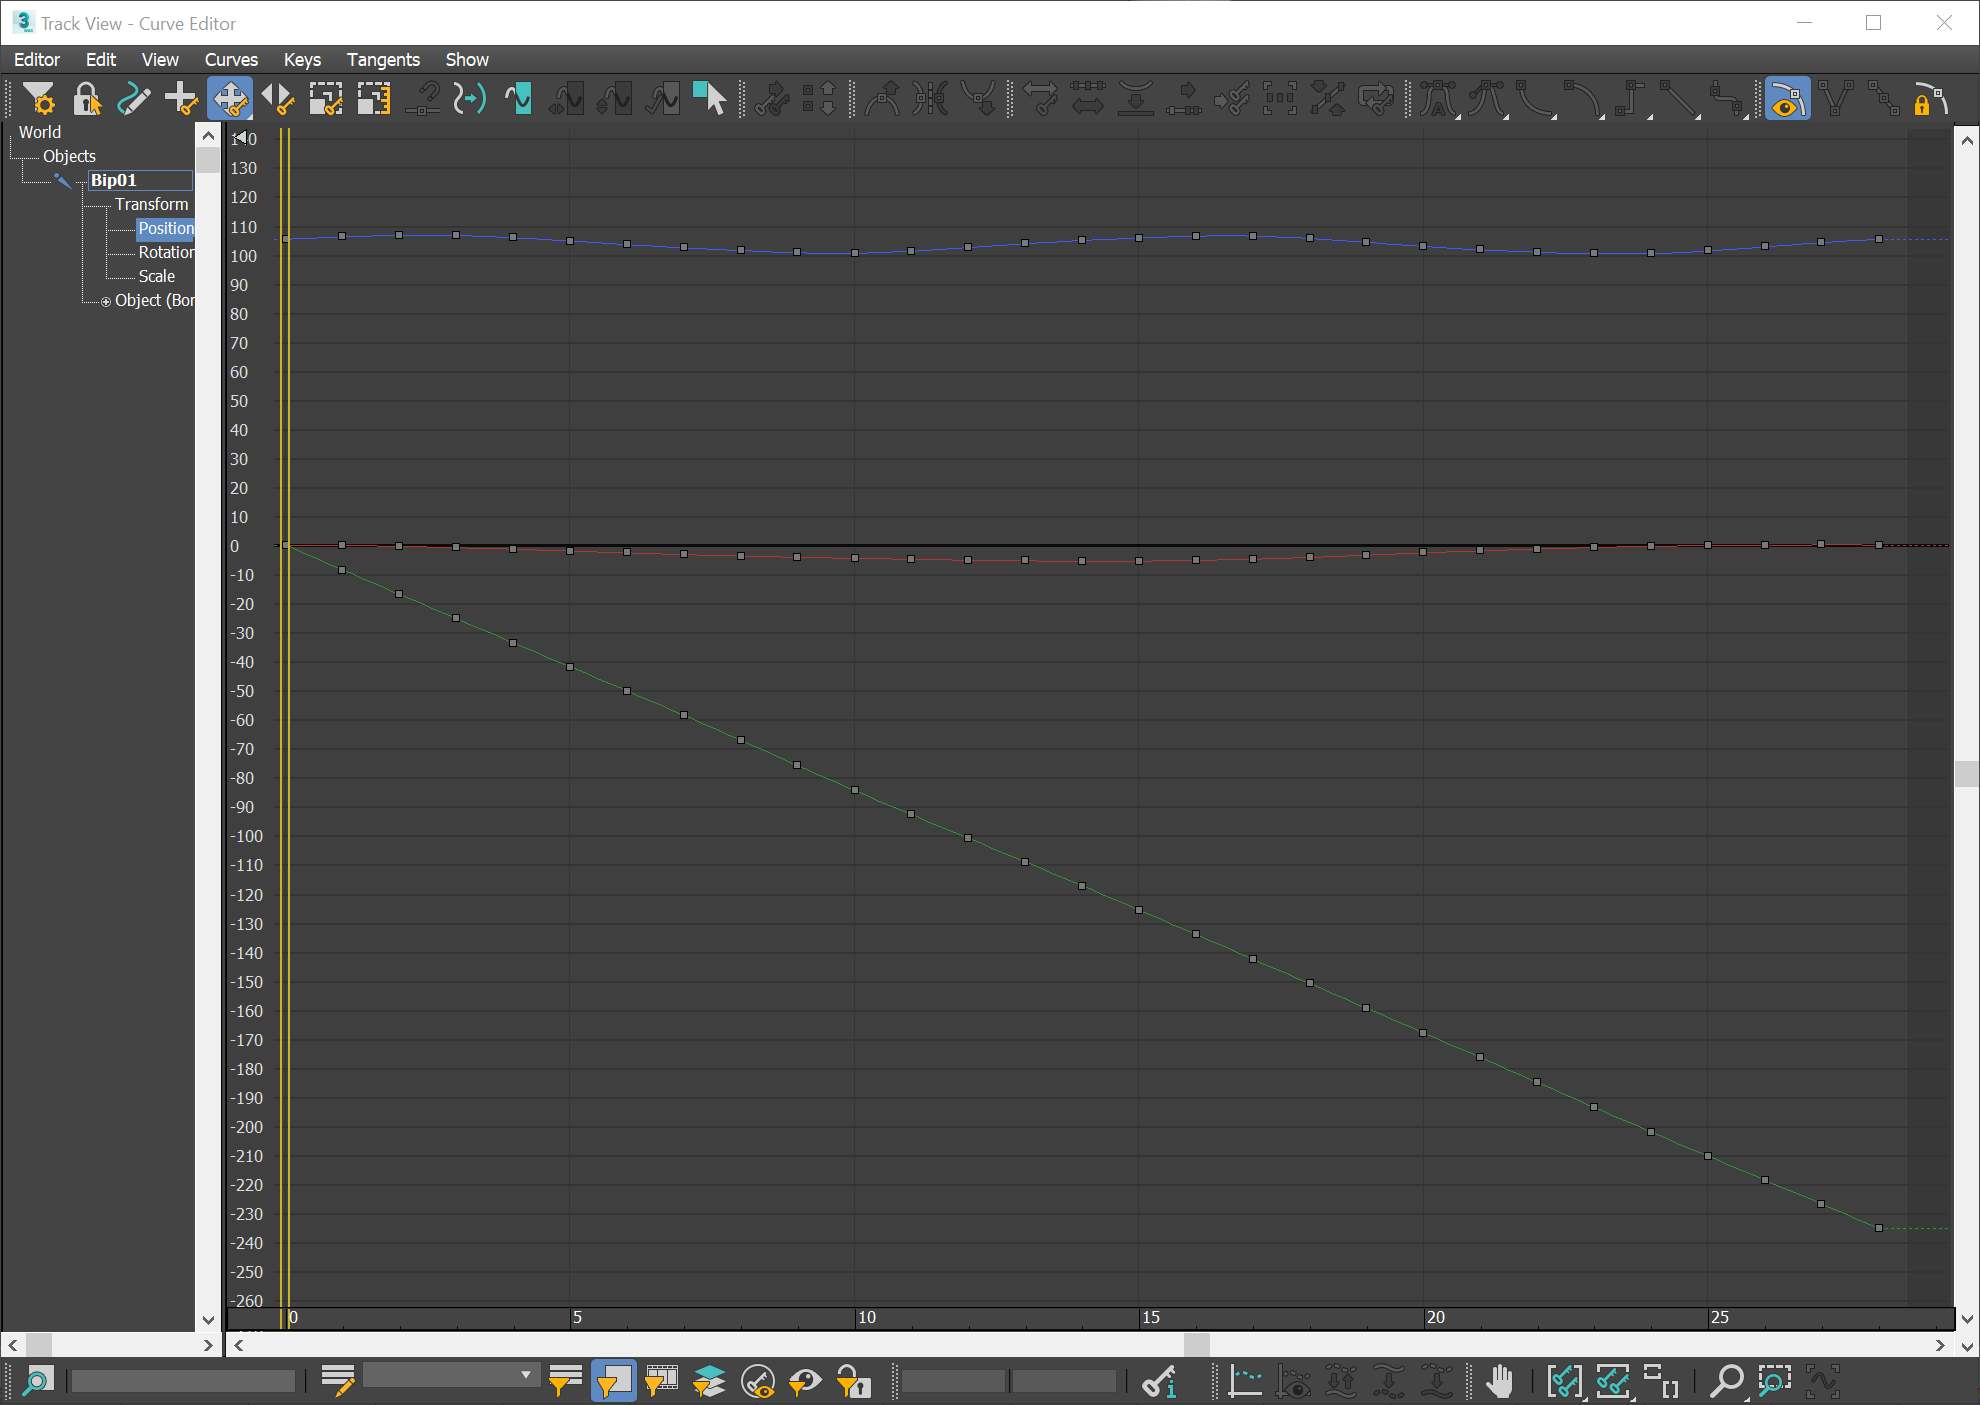 Example of the contents of the Curve Editor with the walking animation and the Root Bone (Bip01) selected. Green is the forward axis as you can easily distinguish by its values. |
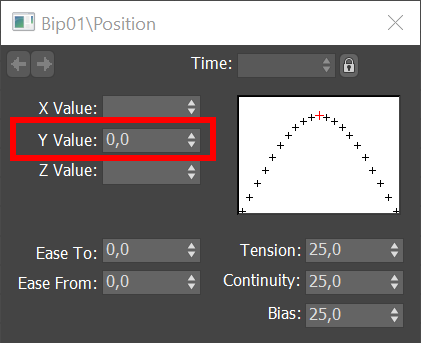
Keyframe Editor Panel
Part 2