I am not covering the basics of using Unreal Engine 4 here unless it is in direct relation to one of the steps I am describing. If you never used Unreal Engine before, please read the documentation of Unreal Engine Basics first (Link)!
Mesh Import Settings
Picking up where we left in the last part, we can now import our model into Unreal Engine.
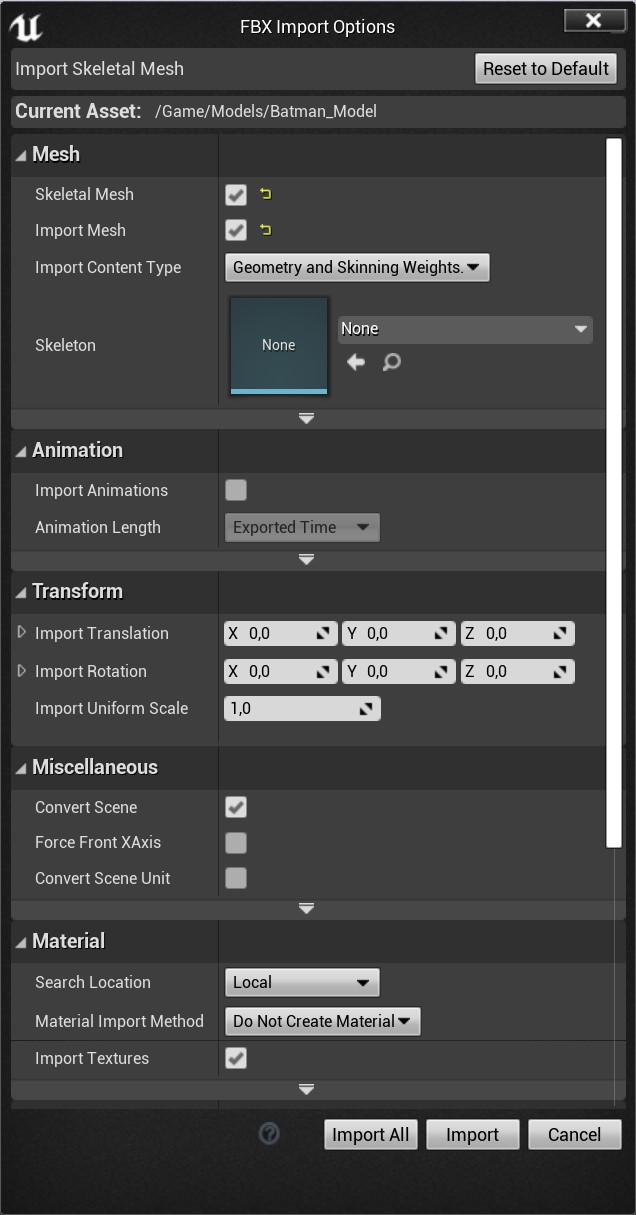
Once you opened the editor you can just drag the previously exported FBX file containing the model into the content browser and it should show a new window with some importing options. You can leave these on default usually, refer to the unreal engine documentation for explanations of the different options. Link
Once you have imported the model you should have three new assets in the content browser, one for the mesh, one for the skeleton and a physics asset. If you open the mesh asset you will notice that the textures/materials are still missing from it, so we will fix this first.
You also might want to change the vertex normal mode to “Import Normals” in the details panel. Simply search for “normal” and the option should be visible.
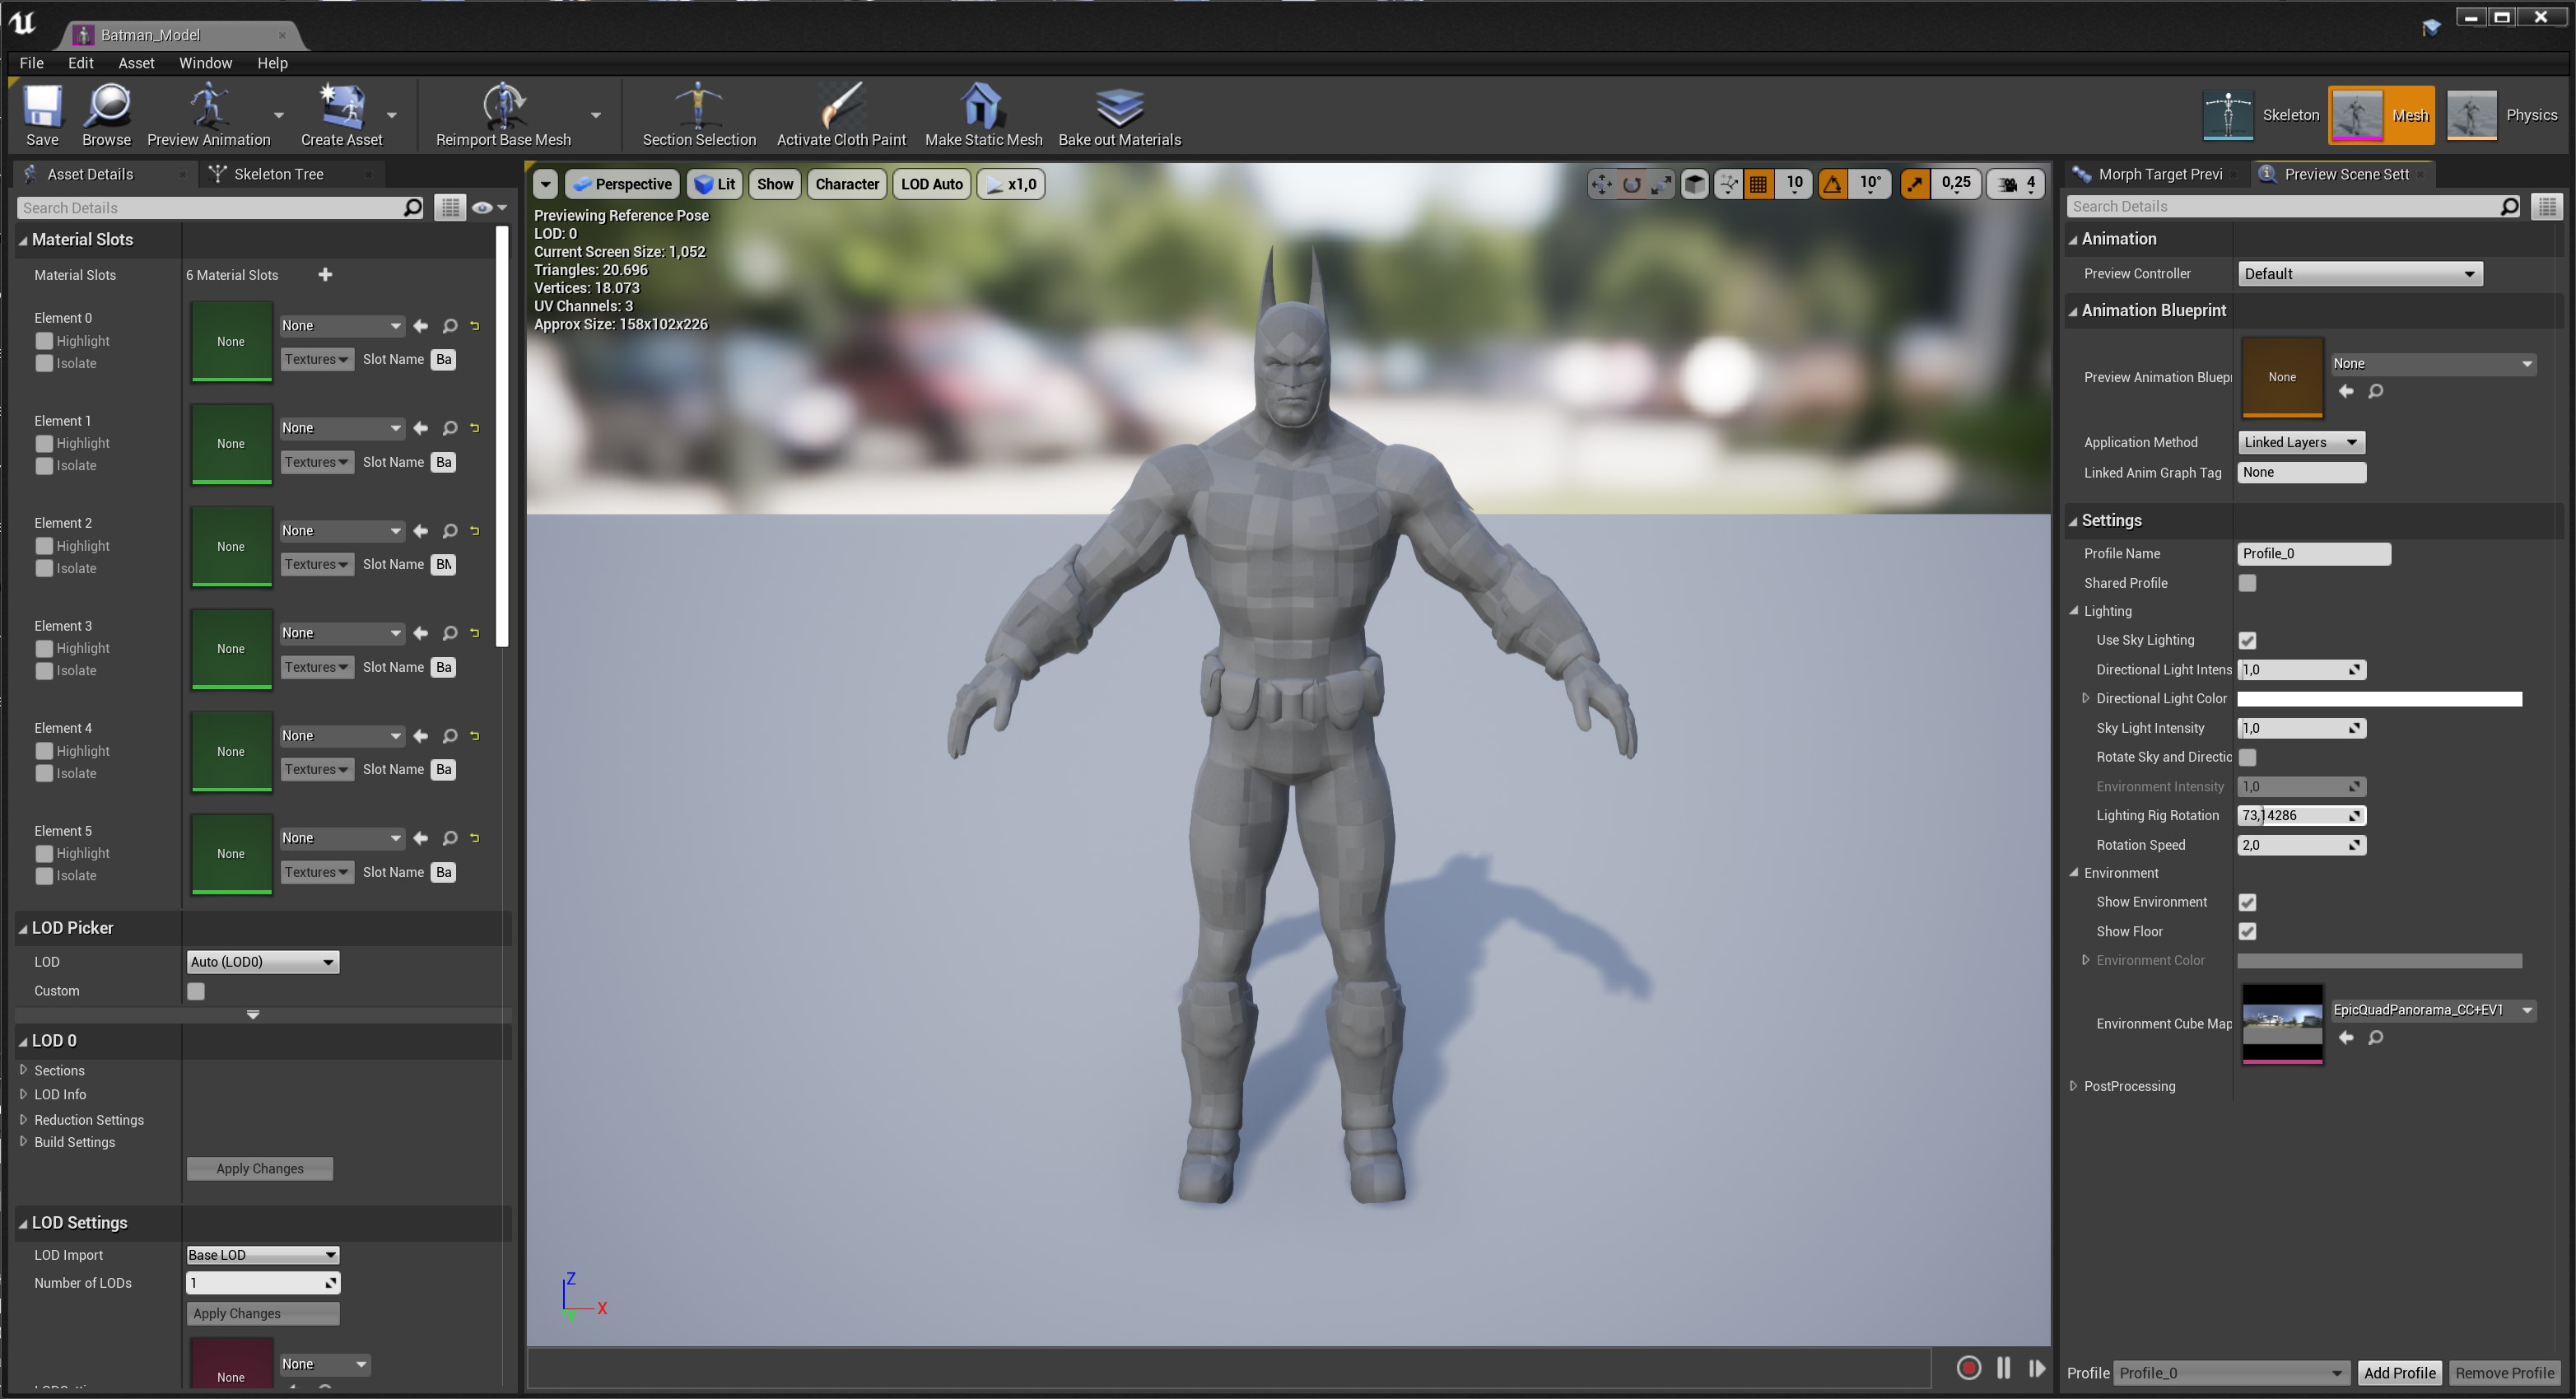
Imported Skeletal Mesh
Textures and Material Shading
One texture alone is far from providing the detailed and seemingly three dimensional look you know and love in games. Usually a so called Material Shader is made up of multiple textures providing different sets of information.
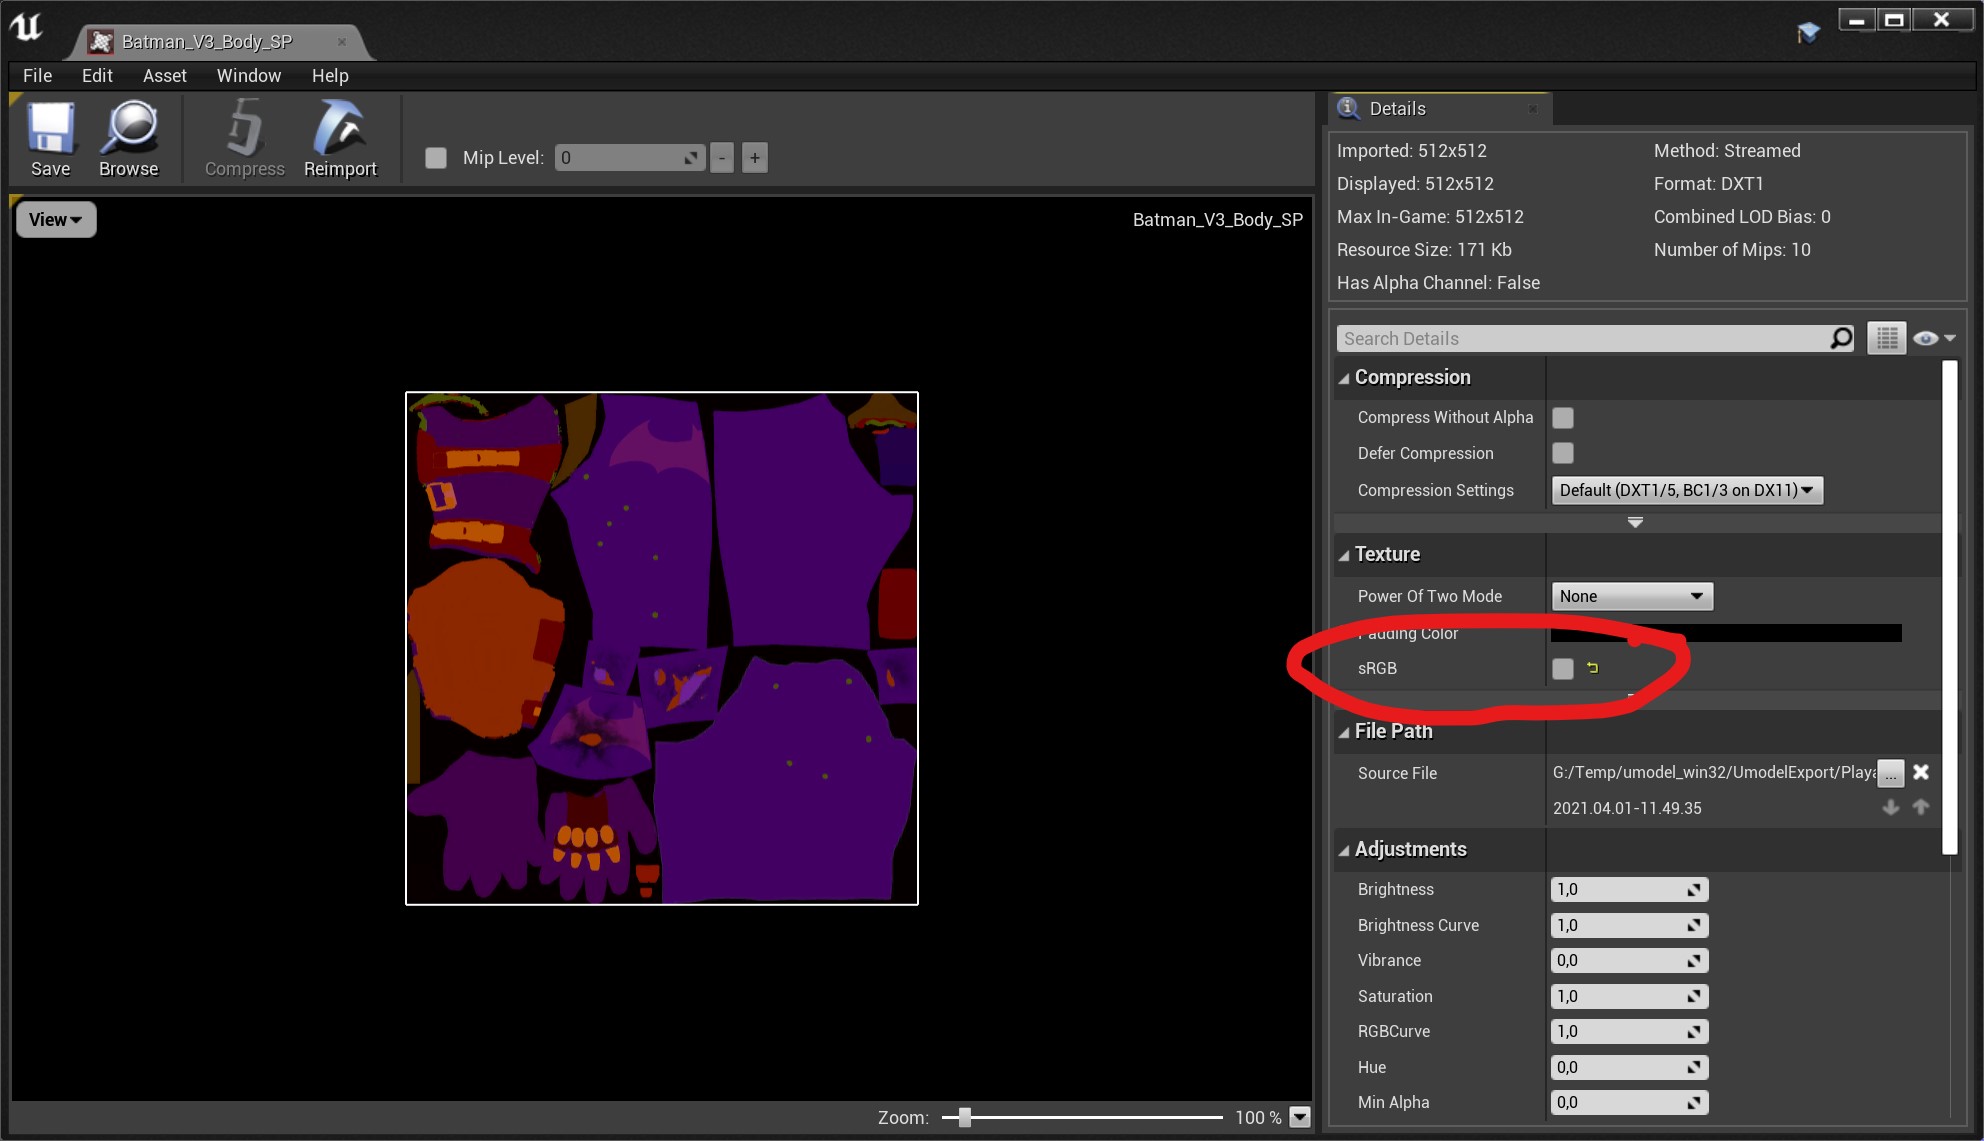
Disabling sRGB Gamma Correction
In this case we have a base color, or also called albedo, texture which is the color of the surface without any baked in shading, a normalmap which provides lighting detail on the geometry surface that wouldnt be reasonable to be done as actual geometry, and one or multiple textures containing material parameters or masks.
Unreal Engine 4 uses a physically based renderer and needs a roughness value and an optional specular intensity value to make a material behave as intended. The Arkham games however dont use a directly compatible shading model (some materials of Arkham Knight are an exception), so in order to get the results we want, we would have to remap the values from the source textures to something Unreal’s renderer can work with. We will do this using Unreal’s material shading graphs.
First off we need to import the model’s textures, which are in the “Texture2D” folder of the extracted model package. Simply drag them into a new folder in Unreal’s Content Browser to import them. You might notice later on that a bunch of textures are missing for the eyes, these can be found in the BmGame.upk package.
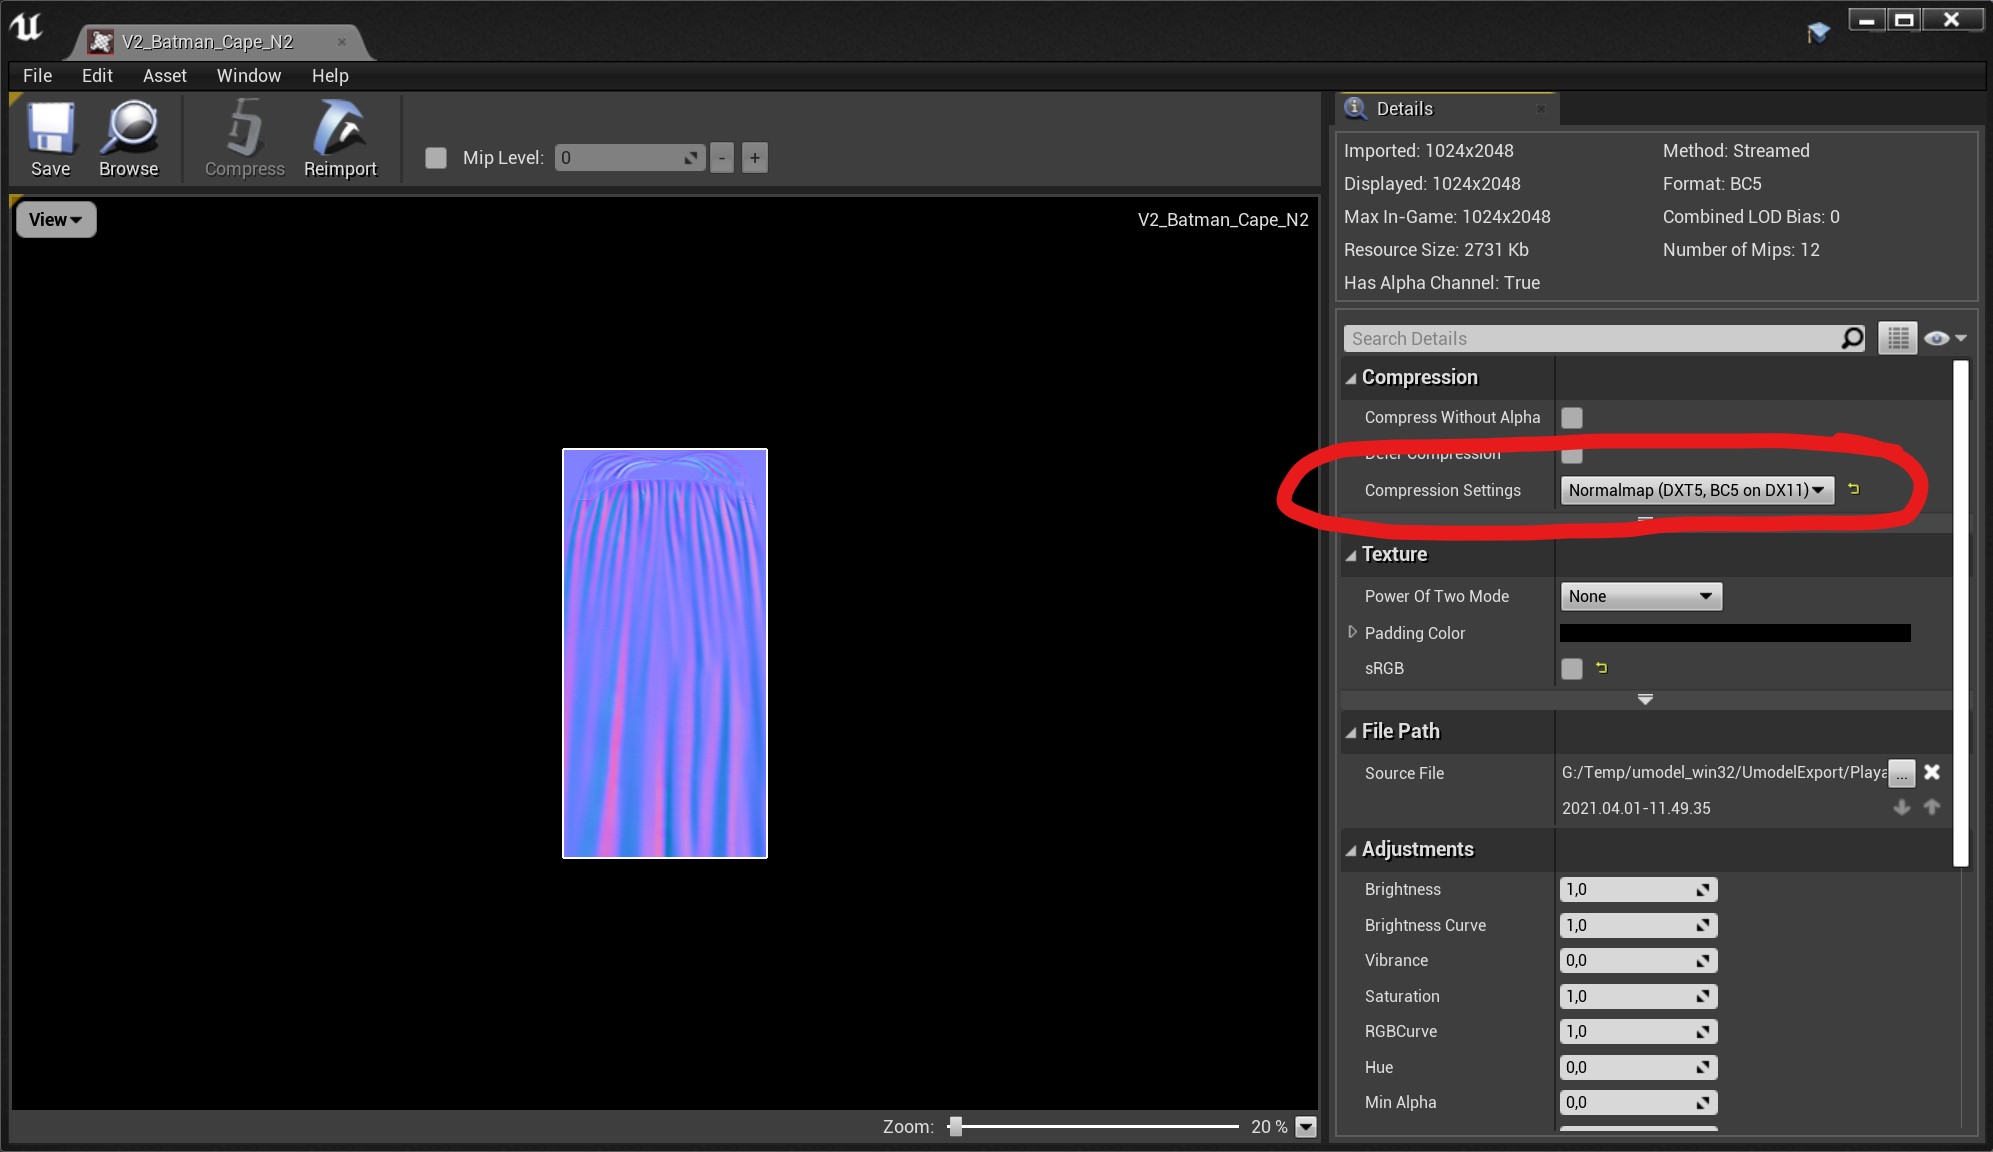
Setting Mode on Cape Texture
Once they are imported you will have to open the textures containing the material properties to disable the sRGB gamma correction on them, as these are not base color textures that need to be gamma corrected. These textures have the suffix “_M” or “_SP”.
The cape normal texture stands out from the other normalmaps as its blue channel contains specular data. For the sake of simplicity I have saved the blue channel into a separate texture using gimp, due to which we can simply set the mode of the cape normalmap to “Normalmap” and Unreal calculates the correct blue channel on its own.
Material Setup
Basic Material Setup
We will now set up a material graph that allows us to get a (mostly) faithful rendering result, which we will begin by creating a new material asset.
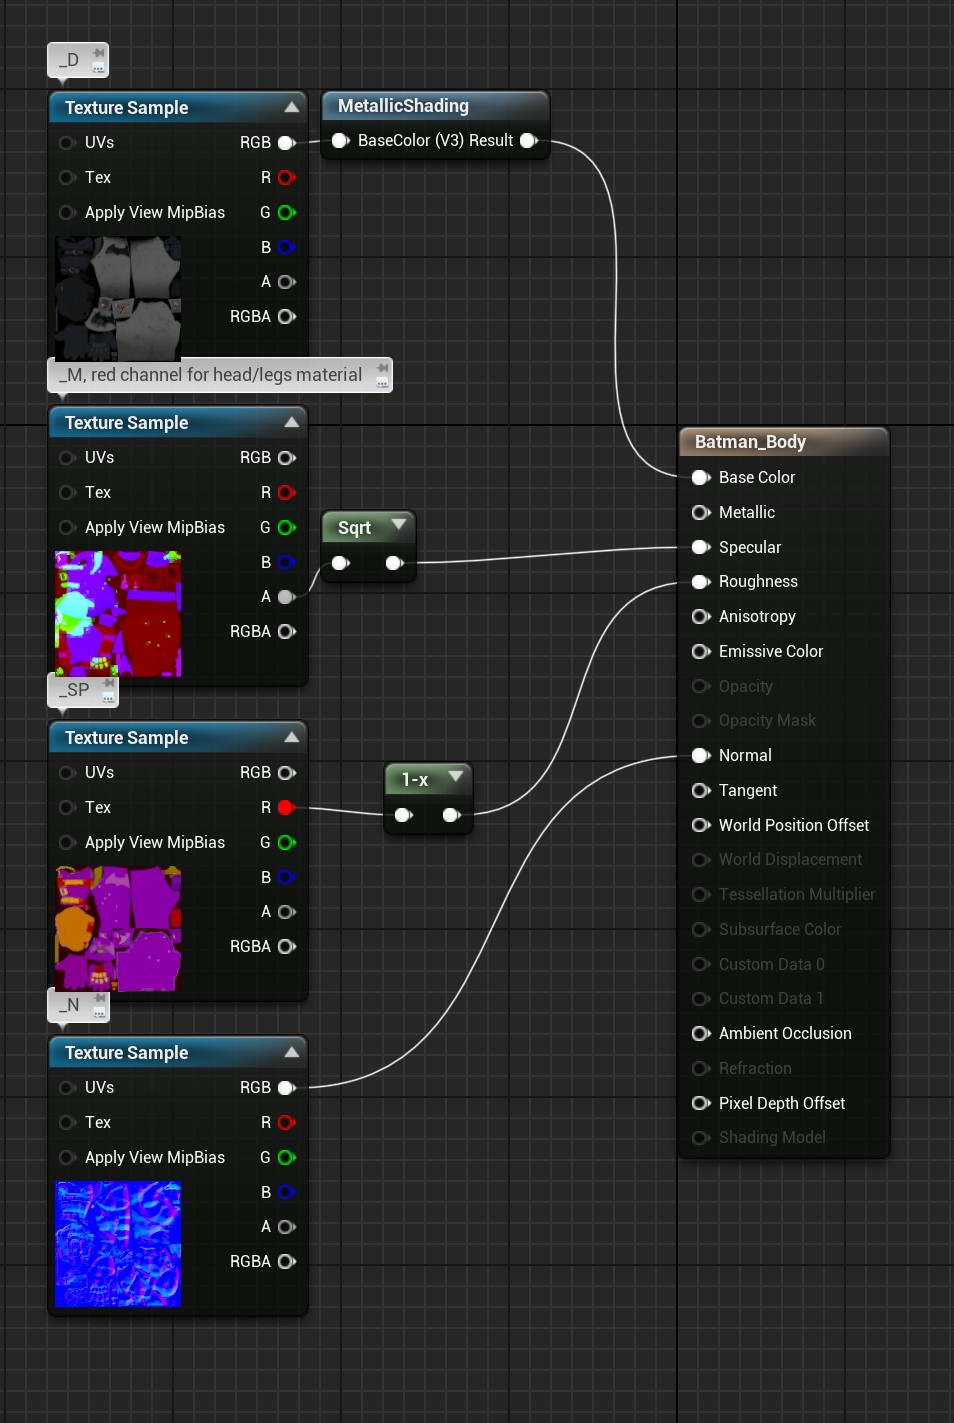
First off you drag the base colour texture into the material and then add a material function that calls “Metallic Shading”. Connect the input to the base colour texture and the output to the base colour material output. We are using this function to get a slightly more authentic result, as the result might appear a bit flat when compared to the original otherwise. Next up you drag the normalmap texure into the graph and simply connect it to the “Normal” material output node. Quite often small scale tiling detail normals are used as well, but we will omit this here for the sake of simplicity. The masks for the detail normal are stored in the green and blue channel of “Batman_V3_Body_And_Head_M”. Now you drag “Batman_V3_Body_And_Head_M” as well as the texture with the suffix “_SP” for the material into the graph and connect the red channel of the “_SP” texture to a “1-x” node and the result of that to the roughness output. For the body material you then connect the alpha channel of the “Body_And_Head_M” texture to a “sqrt” node, and the result of that to the specular output. For the Head Material this would be the red channel. Now you click on “Apply” in the top left corner of the material editor. The face material does not need any value for the specular output.
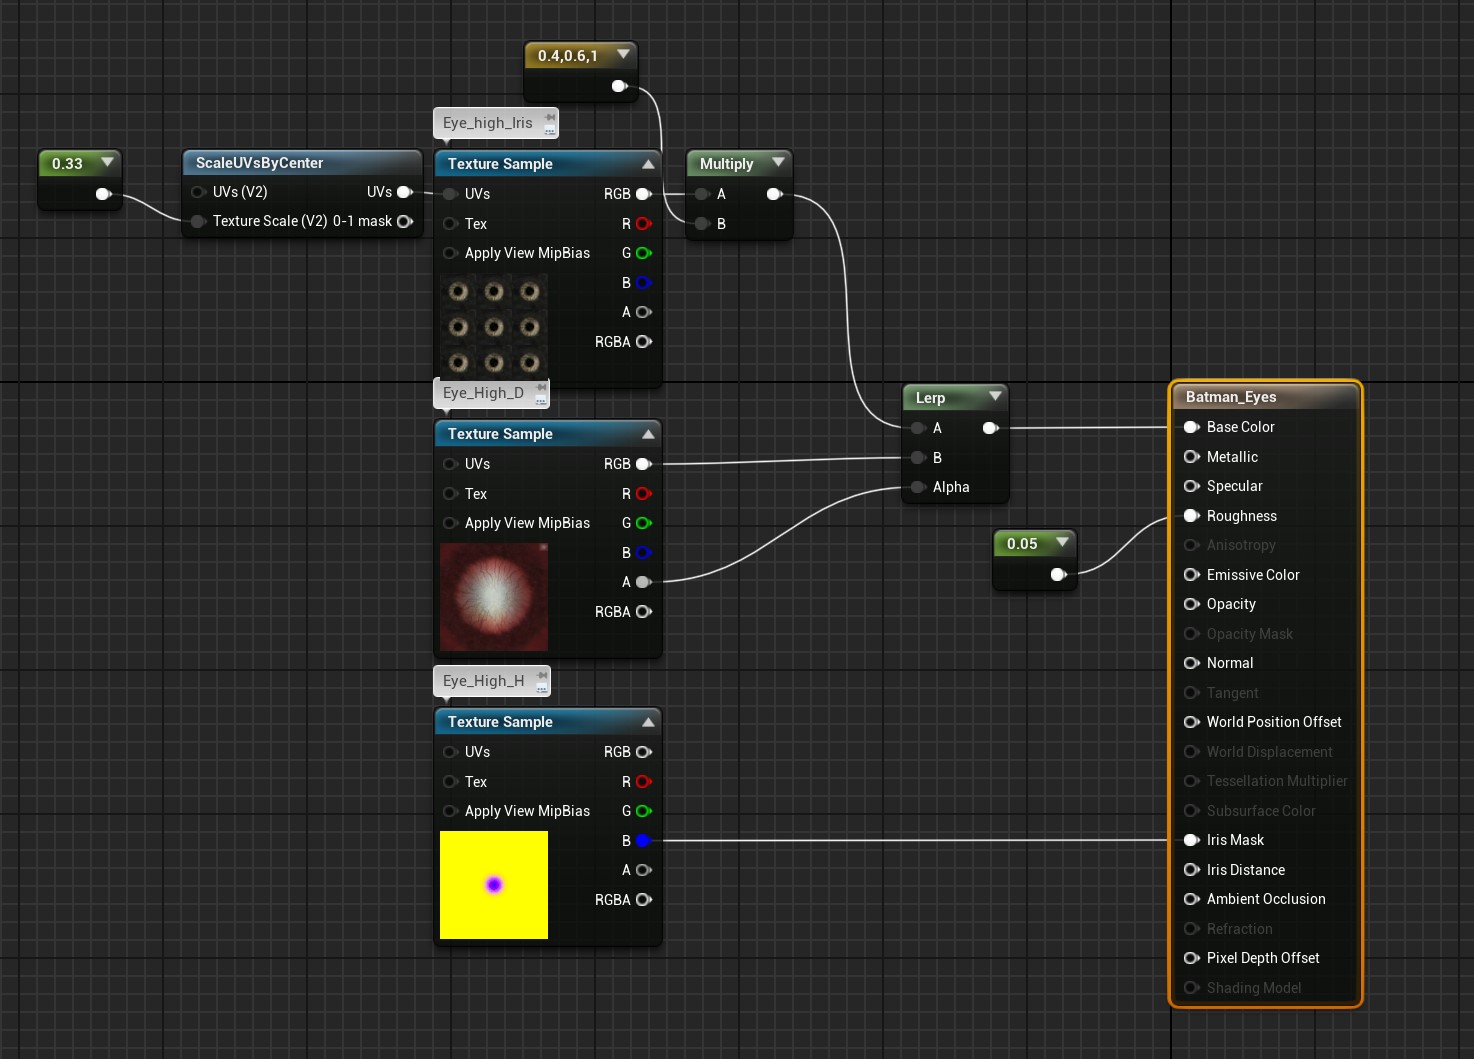
Eyeball Material Setup
For the cape material we simply connect the roughness output to a constant of around 0.7 while using the separated blue channel (as I have mentioned earlier) of the cape normalmap as the specular input. Also make sure to check “Two Sided” in the details panel on the bottom left. To make things a bit simpler I will just attach the material setup for the eyes, as it might be a bit odd at first, but is merely just consisting of scaling the iris texture to fill the hole in the middle of the sclera texture. Make sure to set the Shading Model to “Eye” for the eyeball material though, as it will lead to slightly nicer results.
Once all of that is done you can repeat this for the remaining materials. The next step is assigning the materials to the model, for which we now have to open the skeletal mesh asset. If you look to the left of the model you will see a panel with what is called “material slots”. In order to figure out what material goes where you can either check the slots name or highlight it to see what part of the mesh it belongs to. Simply drag the materials into their respective slots to assign them and after a quick shader recompilation done by the engine you should now see a properly textured and shaded batman model.
If done correctly your model should now look something like this:
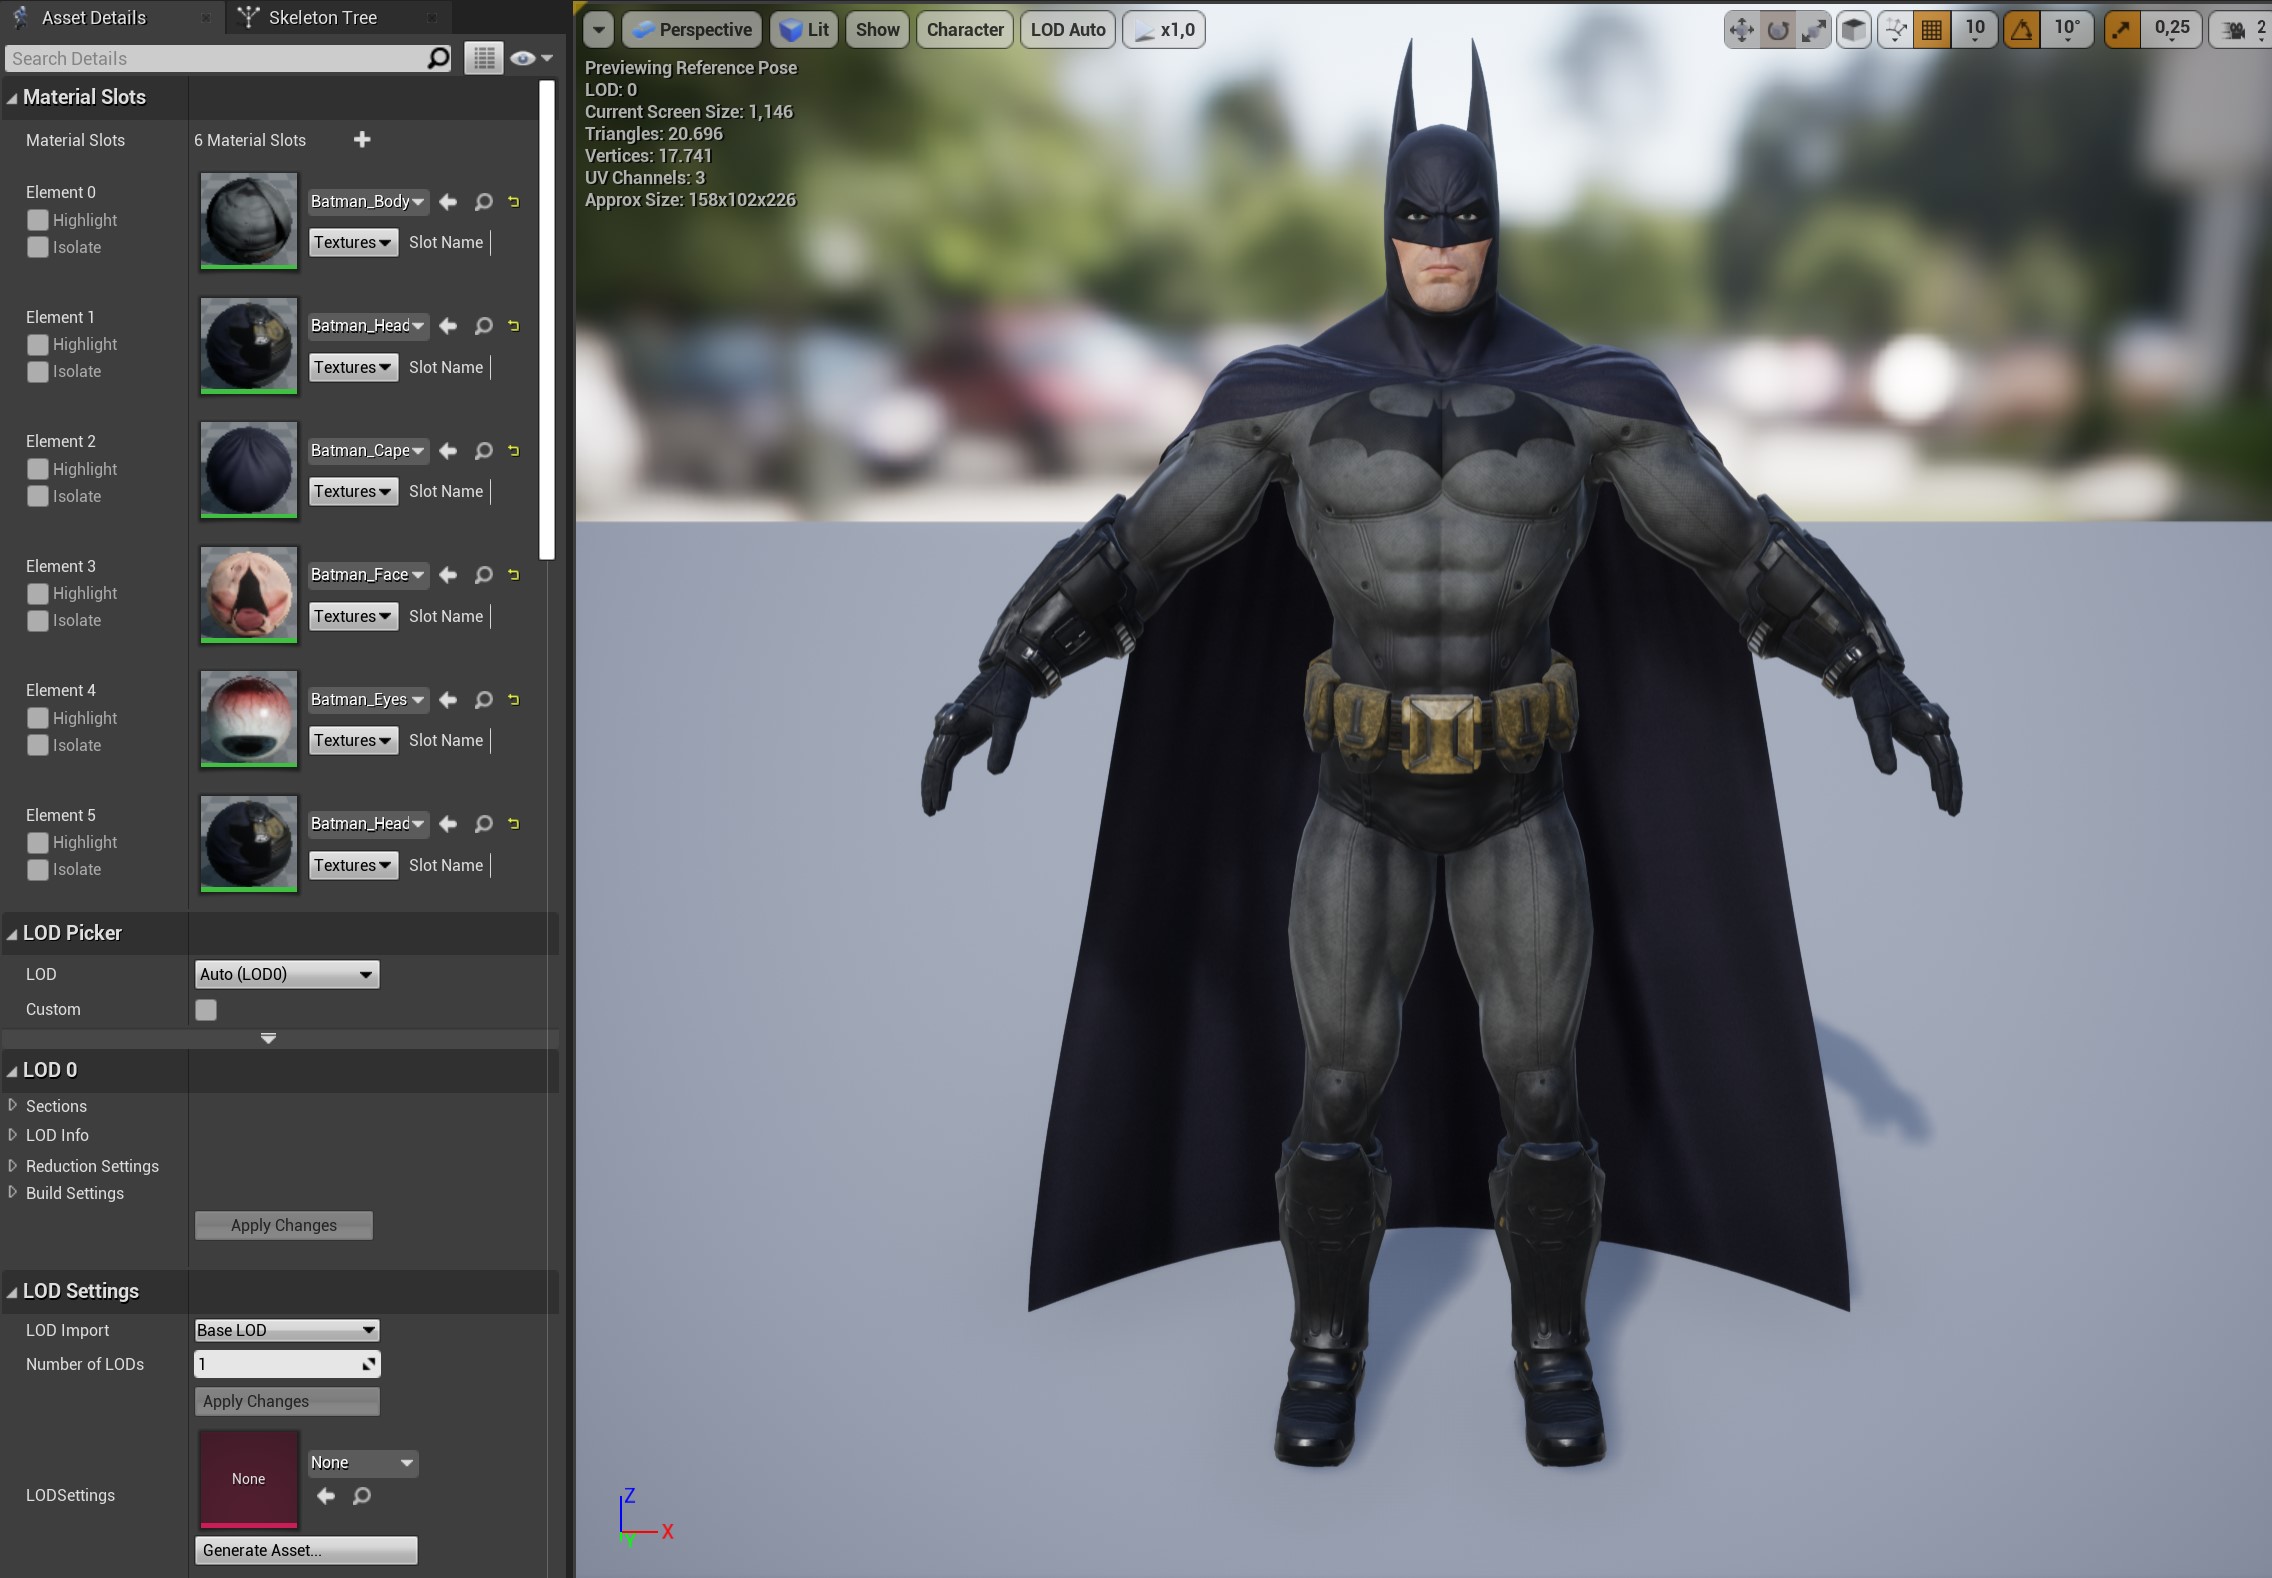
Batman Model with Materials
Importing animations
Now its time to import the animations we extracted in the last part. This is relatively straight forward as you just have to drag the FBX files into the content browser, uncheck the “skeletal mesh” checkbox as we dont want to import the mesh again but just the animation. You will then have to select the skeleton of the Batman mesh so that unreal knows the rig it should import the animations to. After doing that just click “import” and you should be able to view the animations in the editor.

Idle Animation in UE4
Now our assets are set up as we need them and we will continue by doing our gameplay logic in part three. I would however also suggest looking at the third person character template that comes with Unreal Engine, as I will be doing a similar thing since it is a good way to get started without the complicated shenanigans like Root Motion, where I am not even sure if I will cover it extensively since its not exactly something Epic Games seems to encourage using, as its incompatible with networking and such and is even more difficult with the assets we get from the Arkham games unless you do conversion steps beforehand.